This blog post walks through the steps to setup an Azure dev vm for testing Power BI + SQL Server 2016 integration:
- Provision the Azure VM using SQL Server 2016 developer image
- Configure the SSAS/SSRS services
- Install development software
- Install sample databases
- Integrate SSRS and Power BI Service
- Install and configure Personal Power BI Gateway
- (Optional) Install and configure Enterprise Power BI Gateway to support Direct Query and live SSAS connection
1. Provision the Azure VM using SQL Server 2016 developer image

Assuming we already have an Azure account, we can log on the Azure portal and select to create a new Virtual Machine using SQL Server 2016 RTM Developer image. On the Basics tab of the “Create virtual machine” wizard, we need to provide the name of the VM we aims to create and the username/password of the local administrator of the VM.

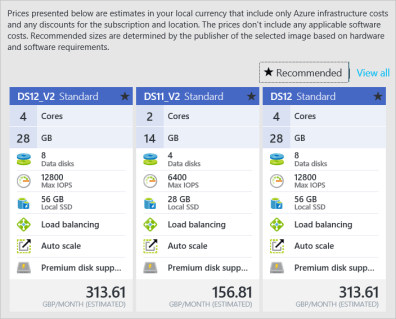
Next, we need to select the size of the virtual machine from a broad range of options offered by Azure platform. Microsoft recommends DS3 or above for a production environment, but as we are going to use this VM only for development and testing, we can choose something smaller. I chose DS11_V2 personally for my environment.
We then need to configure the settings for Storage, Network, etc., we can use the default settings if there is no specific requirement applied.

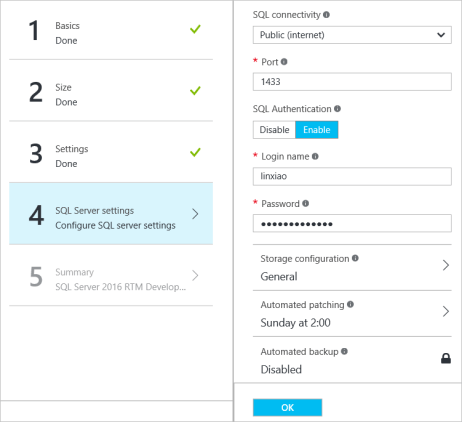
Lastly, we need to configure the SQL Server settings. I have set the SQL connectivity as “Public (internet)” and enabled SQL Authentication in order to access the SQL server from client computers.
After the VM is provisioned, we can log onto the VM and we will find that the SQL Server 2016 database engine along with SSIS, SSAS and SSRS components have all been installed and set to run.

2. Configure the SSAS/SSRS services shipped with the image
2.1 (Optional) Change SSAS from Multidimensional model to Tabular model
In the VM we have created from the SQL 2016 developer image, the SSAS is deployed in the Multidimenional mode by default. If we need to work with the SSAS Tabular model, we can change the deployment mode in the SSAS configuration file which is located at C:\Program Files\Microsoft SQL Server\MSAS13.MSSQLSERVER\OLAP\Config\msmdsrv.ini.
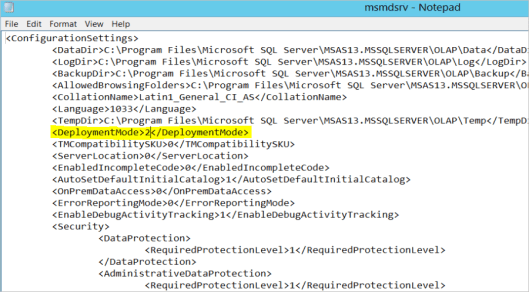
Open the file, and change the DeploymentMode from 0 to 2. Before the change takes effect, we need to restart the SSAS services on the SQL Server Configuration manager.

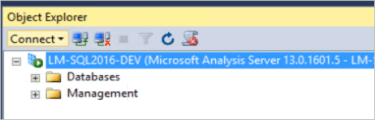
After the SSAS services is restarted, we can see the SSAS is running using Tabular model.
2.2 Configure Reporting Services
Next, we need to configure the reporting services through the Reporting Services Configuration Manager wizard.
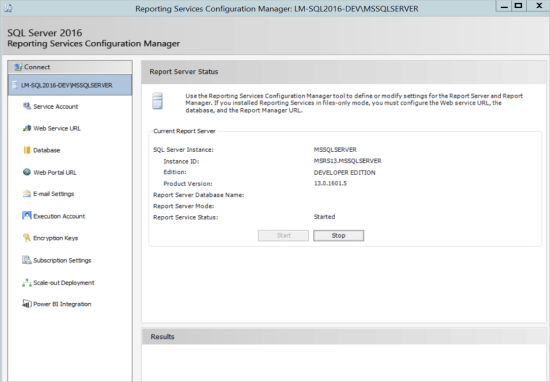
The steps to configure SQL Server 2016 reporting services are pretty similar to the configuration of previous versions. We should be able to find tons of guides on the Google. The only configuration specific for SQL Server 2016 is related to the Power BI integration which will be covered later in the blog post. After the Reporting Services is configured, we should be able to access the reports web portal to manage SSRS reports.

3. Install development tools
Some dev tools we need to install on the VM, including SSDT, Power BI Desktop and DAX Studio:
The link for SSDT: https://msdn.microsoft.com/en-us/library/mt204009.aspx
The link for Power BI Desktop: https://powerbi.microsoft.com/en-us/get-started/
The link for DAX Studio: http://daxstudio.codeplex.com/
4. Install Databases Sample
A number of sample databases can be deployed in the VM as test data sources to support BI development:
- The new Microsoft Wide World Imports Sample database for SQL Server 2016: https://msdn.microsoft.com/library/mt748083(v=sql.1).aspx
- Adventure Works OLTP database 2014 (compatible for SQL Server 2016) https://msftdbprodsamples.codeplex.com/downloads/get/880661
- Adventure Works DW database 2014 (compatible for SQL server 2016)
https://msftdbprodsamples.codeplex.com/downloads/get/880664 - Adventure Works Tabular Model
https://msftdbprodsamples.codeplex.com/downloads/get/882335
5. Integrate SSRS and Power BI Service
The 2016 version of SQL Server Reporting Services comes with a very cool feature that allows SSRS developers to pin SSRS charts onto Power BI dashboard. We can take the following steps to enable this feature.
Firstly, we need to enable the SQL Server Agent.

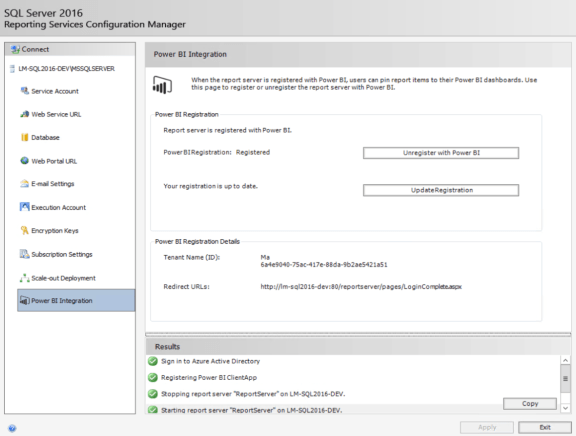
Then, we go to the Reporting Services Configuration Manager and register the Report server with the Power BI service.
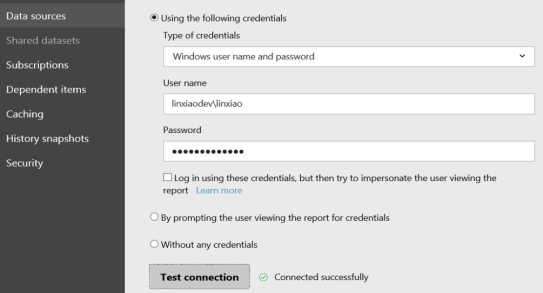
After the report server is registered with Power BI services, we go to Report Manager, locate the report we want to pin to Power BI dashboard, and check whether stored credentials are used in the report, if not, we need to use stored credentials in the report.
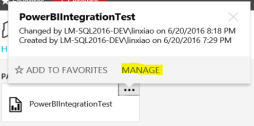
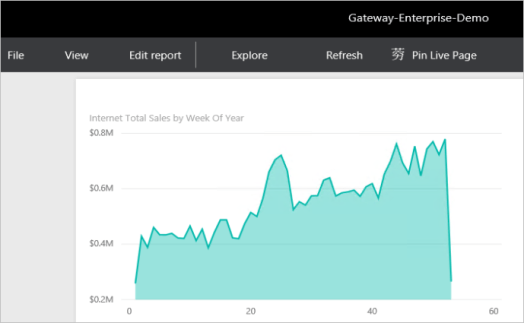
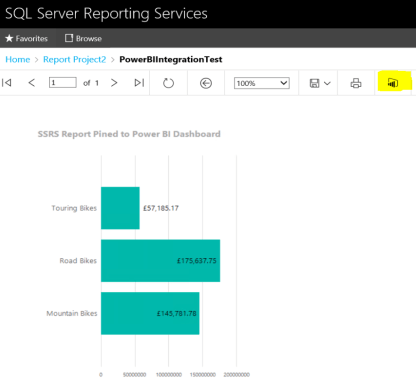
Now, we are ready to pin the SSRS charts to Power BI dashboard.
6. Install and configure Power BI Personal Gateway
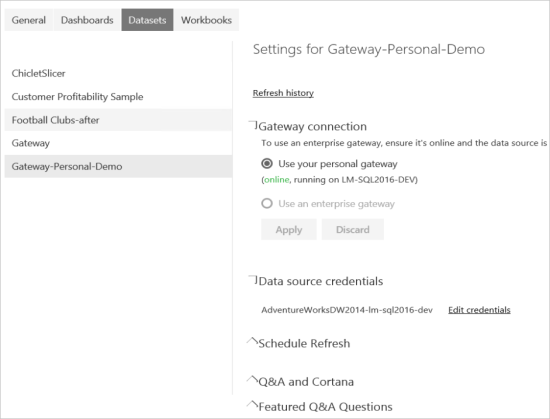
As we have our SQL Server engine and sample databases up running in the Azure VM, we can now connect to those databases to build Power BI reports and publish them to the online Power BI services. However, to allow the online Power BI services to refresh the data sources hosted in the Azure VM, we also need to setup the Personal Gateway.
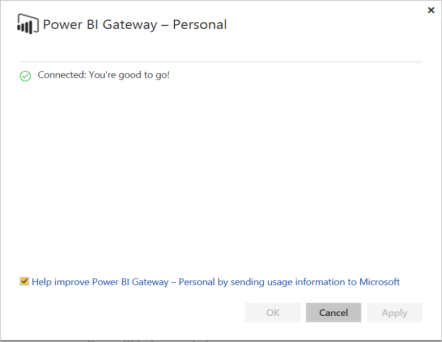
Firstly, we need to download the Personal Gateway from the Power BI web site: https://powerbi.microsoft.com/en-us/gateway/, and install the app on the Azure VM. The installation process is very simple, and we should not meet any problem here. After the Personal Gateway is installed, we will be asked to sign in the Power BI online service with our Power BI account to setup the connection between the Personal Gateway and the Power BI services.
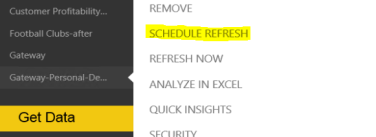
Now we can connect our Power BI reports to the data sources hosted in the Azure VM and schedule refresh on the report.
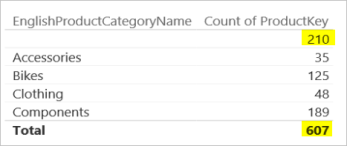
To test the refresh, I have built a report using the Adventure Works products table which displays the number of products in each product category.
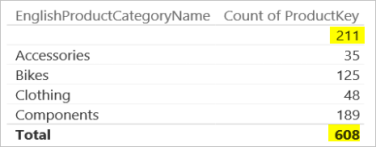
I have then made a change to the project table, i.e., added a new product.

After refreshed the dataset on Power BI online portal,
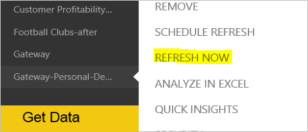
the report on the online Power BI was updated to reflect the change.
7. (Optional) Install and configure Enterprise Power BI Gateway to support DirectQuery and live SSAS connection
Now we have setup the Personal Gateway that empowers Power BI services to refresh/load data from the data sources hosted in the Azure VM. However, there are some important features missing from the Personal Gateway, i.e., the support of DirectQuery and live SSAS connections. Those features are only available in the Enterprise edition of Power BI Gateway.

We can download the Enterprise Gateway from Power BI website and run the installation application on the Azure VM. After the installation process is completed, we need to log on the Power BI services to configure the data source connection and service account/credentials.
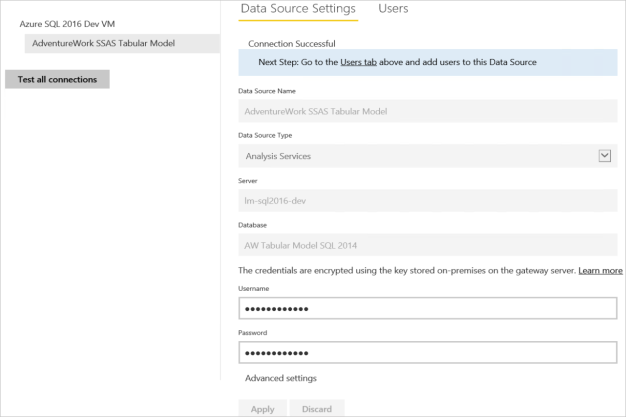
Now the Enterprise Gateway should start to be working. However, when I was trying to access the datasets on Power BI services, I got the following error:

After a little bit further researching on how SSAS live connection works, I’ve learnt that the stored credentials I configured in the Data Source Settings (snapshot above) only setup the initial connection to the SSAS services, and the actual queries are executed based on individual user’s permissions. For the SSAS services to know which user the current query is from, along with the query itself, the EffectiveUserName property (in the format of UPN) of the Power BI user, who started the query through UI interaction, is also passed through Enterprise Gateway to the SSAS. The UPN passed from Power BI needs to match a windows account in the local Active Directory (which is the Power BI user’s mapping account in the on-premise Active Directory). SSAS will then check the Analysis Services roles of the matched windows account and decide whether to execute the query.
To get the SSAS live connection working in our Azure VM environment, the setup need to meet the following requirements:
- The Azure VM has to be in an Active Directory Domain
- A windows account need to be created in the Active Directory for each Power BI services user.
- The UPN of the Power BI user account need to be mapped to the UPN of the windows account
- The windows account need to be added into the appropriate Analysis Service role
To meet those requirements, we need take the following steps:
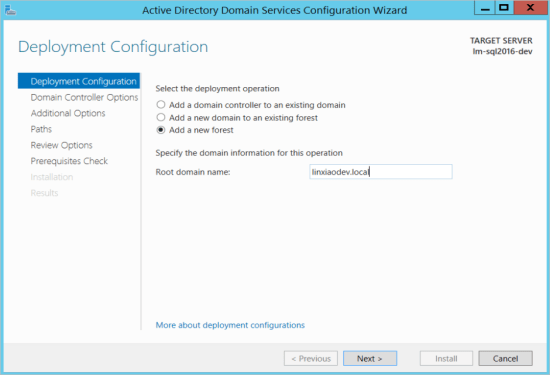
Firstly, we need to promote the Azure VM to be a Domain Controller so that the Azure VM itself will be in the domain.
Then, we need to create a windows account (e.g., linxiaodevlinxiao.ma) with UPN like (linxiao.ma@linxiaodev.local) which is the mapping account for the Power BI user.
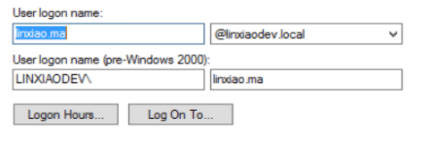
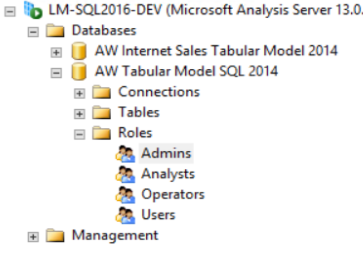
and added the account into the “Users” role in SSAS.
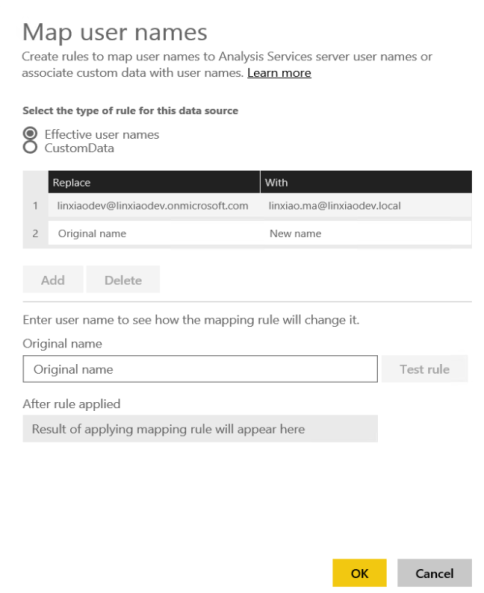
Next, we need navigate to the “Map user names” panel on the Power BI portal and added a rule to map the UPN of a Power BI user account to the UPN of the windows account we have created.
Now, all the settings have been done and the datasets and reports on the Power BI services should start to get data through from the live SSAS data source.