*please download the source code here
Microsoft has released the public preview of their newest data science service, Azure Machine Learning, that contains a collection of components to support the end-to-end machine learning solution. The Azure Machine Learning Workbench and the Azure Machine Learning Experimentation service are the two main components offered to machine learning practitioners to support them on exploratory data analysis, feature engineering and model selection and tuning.
This blog post describes how to conduct machine learning experiments with the supports of Azure Machine Learning Workbench and Azure Machine Learning Experimentation service. As the term “Experiment” implies, the process of building a machine learning model is not a waterfall process but instead an iterative process that involves multiple iteration of exploratory analysis, feature engineering, model selection and parameter tuning. To simplify the iterative experiment process and keep the experiment code in a neat structure, we can create some scaffolding code that takes care of the repeated operations for each iteration. Combining the scaffolding code and the job run history dashboard and version control feature offered by Azure Machine Learning, machine learning practitioners can conduct their experiments in a more organised style. There are many ways and patterns to construct the scaffolding code. This blog post will give an example and you can design your scaffolding code based on your own use cases.
Setup Azure Machine Learning environment
Firstly, we need to setup Azure Machine Learning environment, including creating experimentation accounts in Azure Machine Learning and installing required development tools on your computer. You can find the detailed guides from Microsoft official documentations here.
At the end of the setup, you should have the experimentation account created in your Azure tenant and installed Azure Machine Learning Workbench, Visual Studio Code Tools for AI, CLI tool and Python on your computer. In this blog post, I will use the Titanic survival dataset as the example that aims to predict the survival chance of a passenger based on a set of attributes of this passenger. You can find the dataset here.
Create Scaffolding Code and Make the Baseline (Iteration 0) Run
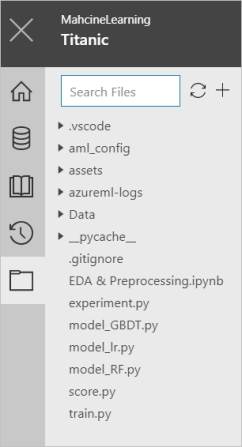
In this example, the following python files will be created to support the iterative experiment, including:
- EDA & Preprocessing Jupyter notebook for EDA, data preprocessing and feature engineering
- Experiment file for conducting the model evaluation, parameter tuning and output results to the job run dashboard
- Individual model files to create the candidate model instance and the parameter options for tuning. In this example, three models are used as candidates, including Logistic Regression, Random Forest, and GBDT.
EDA & Preprocessing.ipynb
In the scaffolding version of the EDA & Preprocessing notebook, we only include the minimum data handling that is just enough to support the baseline run. As you can see from the snapshot below, only one-hot encoding is conducted, and the null values are just simply dropped.

In this example, we will experiment on three models, logistic regression, random forest, and GBDT. We create a separate python file for each model with a single function getModel(). This function will return the model name, model object, the dictionary of parameter options for randomised search cross-validation, and the number of iteration of the random searches.
model_lr.py
from sklearn.linear_model import LogisticRegression
from scipy.stats import randint

def getModel():
    # create logistic regression classifier
    lr = LogisticRegression(random_state = 2)

    # create parameter distribution for parameter tuning
    param_dist = {'penalty': ['l1','l2'],
                  'C': [0.001,0.01,0.1,1,10,100,1000]}

    # return model dict
    return {'name':"Logistic Regression", 'model':lr, 'param_dist':param_dist, 'n_iter': 10}
model_RF.py
from sklearn.ensemble import RandomForestClassifier
from scipy.stats import randint

def getModel():
    # create random forest classifer
    rf = RandomForestClassifier(n_estimators=20)

    # create parameter distribution for parameter tuning
    param_dist = {"max_depth": randint(6,9),
                  "max_features": ['auto', 12],
                  'n_estimators': [20, 50, 100, 150, 200],
                  "min_samples_split": randint(2, 10),
                  "min_samples_leaf": randint(2, 8),
                  "bootstrap": [True, False],
                  "criterion": ["gini", "entropy"]}

    # return model dict
    return {'name':"Random Forest", 'model':rf, 'param_dist':param_dist, 'n_iter': 20}
model_GBDT.py
import lightgbm as lgb
from scipy.stats import randint

def getModel():
    # create GBDT model
    gbm = lgb.LGBMClassifier(boosting_type='gbdt', objective='binary', is_unbalance=True, random_state=2, n_jobs=5)

    # create parameter distribution for parameter tuning
    param_dist = {
        'learning_rate': [0.005, 0.01, 0.1],
        'n_estimators': randint(50,300),
        'num_leaves': randint(20, 80),
        'feature_fraction':[0.5, 0.6, 0.7, 0.8],
        'bagging_fraction':[0.5, 0.6,0.7,0.8],
        'bagging_freq': randint(10,20)
    }

    # return model dict
    return {'name':"GBDT", 'model':gbm, 'param_dist':param_dist, 'n_iter': 20}
Optional – for each model file, you can also append the following code that enables you to perform the parameter tuning individually on each model through directly running of the individual python file.
import pandas as pd
import numpy as np
from sklearn.model_selection import RandomizedSearchCV, cross_val_score
from sklearn.metrics import accuracy_score, precision_score, recall_score

if __name__ == '__main__':
    # load preprocessed training dataset
    train = pd.read_csv('Data/train_processed.csv')

    # specify predictors and target columns
    target = "Survived"
    predictors =  [x for x in train.columns if x not in [target]]

    # fit model with random parameter search
    model = getModel()
    random_search = RandomizedSearchCV(model['model'], param_distributions=model['param_dist'], n_iter=model['n_iter'])
    random_search.fit(train[predictors], train[target])

    # Print top 5 scores and related param options
    results = random_search.cv_results_
    for i in range(1, 6):
        scores = np.flatnonzero(results['rank_test_score'] == i)
        for score in scores:
            print("Rank: {0}".format(i))
            print("score - mean: {0:.3f}, std: {1:.3f}".format(
                  results['mean_test_score'][score],
                  results['std_test_score'][score]))
            print("Parameters: {0}".format(results['params'][score]))
Experiment.py
The experiment file loads the data outputted from the EDA & Preprocessing notebook and fits into the models loaded from model_lr, model_RF, and model_GBDT files. RandomizedSearchCV is used to search the best parameters for each model (from the pre-defined parameter options). The best score for each model will then be logged into the job run history dashboard.
import pandas as pd
import numpy as np
from sklearn.model_selection import RandomizedSearchCV, cross_val_score
from sklearn.metrics import accuracy_score, precision_score, recall_score

from azureml.logging import get_azureml_logger
run_logger = get_azureml_logger()

import model_GBDT
import model_lr
import model_RF

def runExperiment():
    # load preprocessed training dataset
    train = pd.read_csv('Data/train_processed.csv')

    # specify predictors and target columns
    target = "Survived"
    predictors =  [x for x in train.columns if x not in [target]]

    # get models from model files
    models = [model_GBDT.getModel(), model_lr.getModel(), model_RF.getModel()]

    # fit models with random parameter search and log the best score for each model to AML job run dashboard
    for model in models:
        random_search = RandomizedSearchCV(model['model'], param_distributions=model['param_dist'], n_iter=model['n_iter'])
        random_search.fit(train[predictors], train[target])
        results = random_search.cv_results_
        scores = np.flatnonzero(results['rank_test_score'] == 1)
        score = results['mean_test_score'][scores[0]]
        run_logger.log(model['name'], round(score, 3))


if __name__ == '__main__':
    runExperiment()
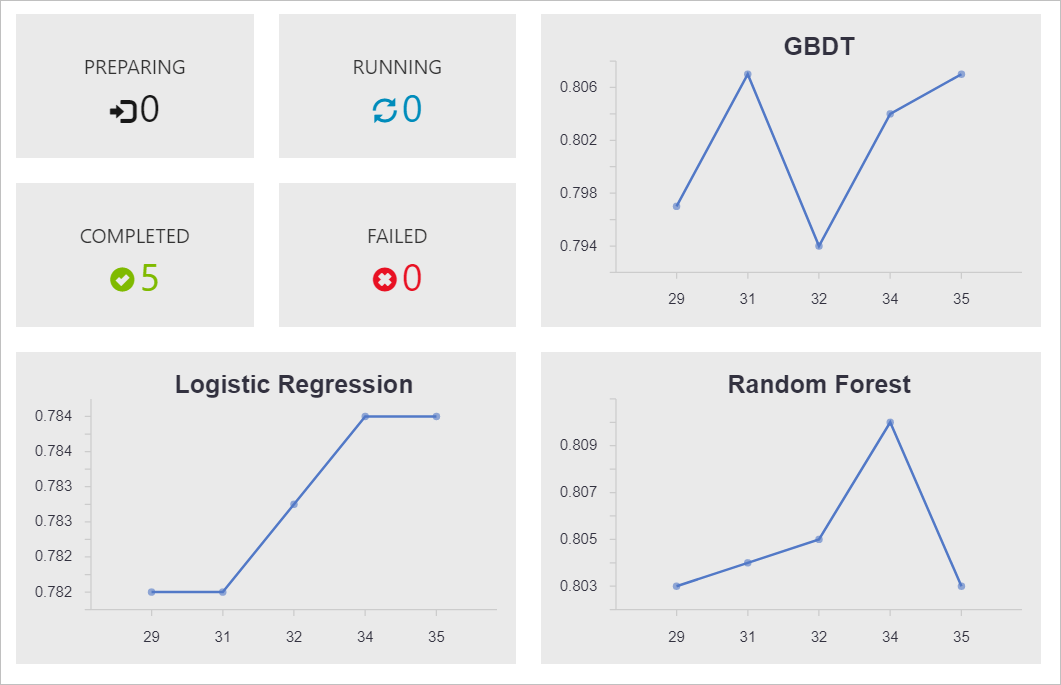
In the Azure Machine Learning Workbench, we can run the Experiment file. The job run history dashboard will show the results for each experiment iteration. The snapshot below shows the results after the baseline (iteration 0) run.


Experiment – Iteration 1…n
After the scaffolding code is in place and the baseline evaluation scores are available, we can start our formal experiment iterations to improve the model performances. For each iteration, we may conduct various operations on data preprocessing, feature engineering and parameters tuning, and we can then run the Experiment file to generate the result on the job run history dashboard.
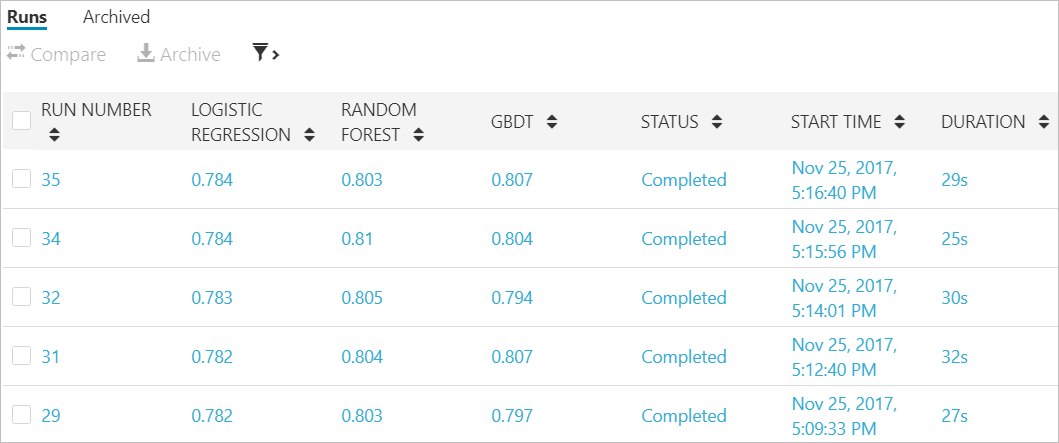
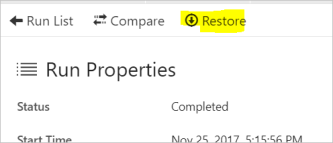
All the experiment iteration job run will be version controlled by the Azure Machine Learning Experimentation service. You can restore the code for any previous experiment iteration.