In the first blog post of the SSIS in Azure series, I gave a demonstration on how to create SSIS packages to move data in cloud, using a common use case that periodically ingests data from Azure SQL database to Azure Data Lake Store. In the pre-ADF V2 era, we can only deploy SSIS packages in on-premises SQL Servers or SQL Servers in Azure VM. Thanks to the Azure-SSIS integration runtime that is available for public preview in Azure Data Factory V2, we can now directly deploy and execute our SSIS packages in Azure without needing to provision and manage an Azure SQL Server VM (One thing to note, under the hood, Azure-SSIS integrated runtime itself is a cluster of Azure VMs that are dedicated to run SSIS packages).
This blog post will walk through the steps to deploy, execute and monitor the SSIS package we have created in previous blog post in the Azure-SSIS integration runtime.
First of all, we need to have an Azure-SSIS integration runtime created in our Azure tenant. This can be achieved using the PowerShell scripts provided by Microsoft.
I have met an issue when running the scripts. Here is the hint in case you run into the same issue. If the Set-AzureRmDataFactoryV2 and the Set-AzureRmDataFactoryV2IntegrationRuntime cmdlet in the PowerShell scripts fail to execute and raise the “HTTP Status Code: NotFound” error even after you have installed the Azure PowerShell modules (we can see the AzureRM.DataFactoryV2 module is installed after checking the C:\Program Files\WindowsPowerShell\Modules folder), it may be caused by the incompatible versions between AzureRM modules. As the “Install-Module AzureRM -AllowClobber” cmdlet only installs the Azure modules that are not already installed in your computer, the Azure modules on which the AzureRM.DataFactoryV2 module is dependent are not updated. The simplest solution to this issue is to remove all AzureRM modules in the C:\Program Files\WindowsPowerShell\Modules folder and then run the Install-Module AzureRM -AllowClobber cmdlet.
After the PowerShell scripts is successfully run, an Azure Data Factory V2 instance and a SSISDB Azure SQL database are created in the resource group we specified in the scripts.

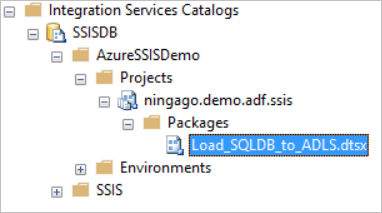
The SSISDB is the Azure-hosted SSIS catalog where you can deploy your SSIS packaged into. We can use SSMS to connect to the SSISDB. On the Connect to Server dialogue in the SSMS, we need to specify the Server name as the Azure SQL server where the SSISDB SQL database is hosted.

After we specified the server name and the login details, don’t click the Connect button to connect to the SQL Server, but instead click the Options button to open the Connection Properties tab. On the Connection Properties tab, set “Connect to database” field as SSISDB database. This settings will allow you to connect to the SSISDB SSIS catalog after clicked the Connect button.


We can deploy our SSIS package into the SSISdB catalog either by using Deploy Project option in SSMS

or using Deploy option in you SSIS SSDT project in Visual Studio.
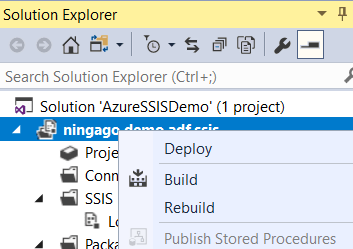
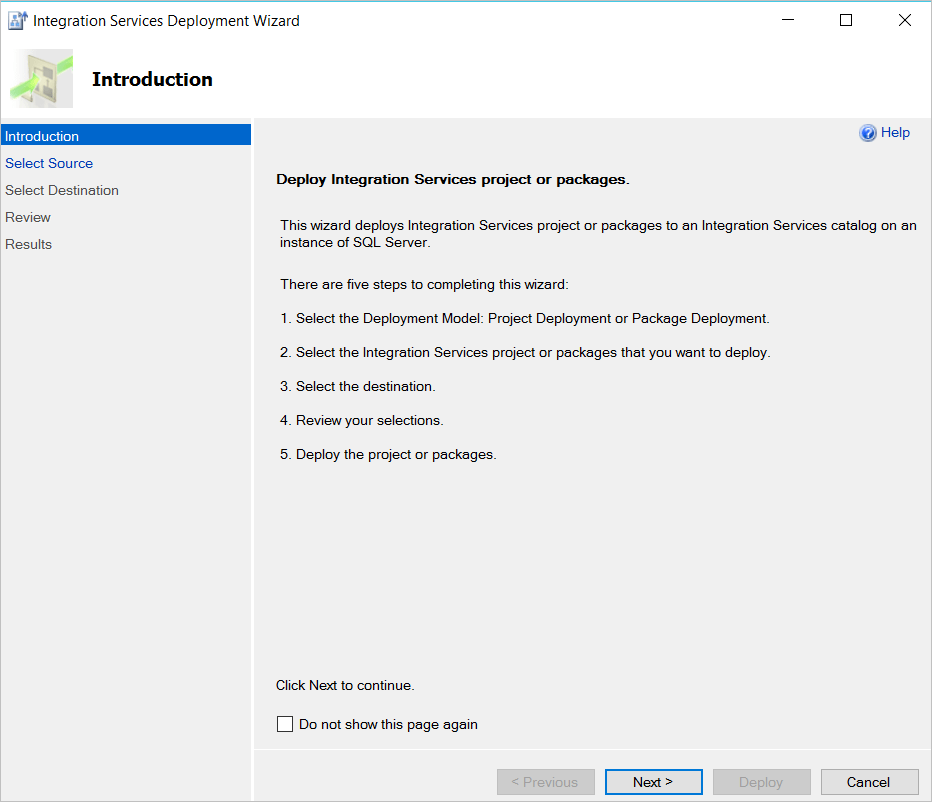
Both options will launch the Integration Services Deployment Wizard dialog to guide us through the steps for the SSIS package deployment.
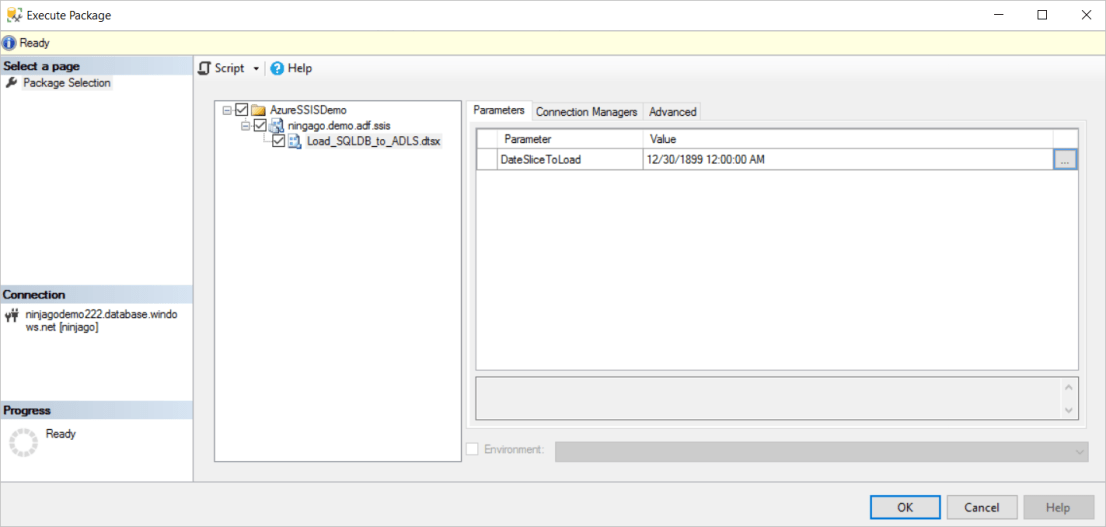
We can execute the deployed SSIS packages in SSMS by right-clicking a SSIS project or SSIS package to launch the Execute Package dialog. The SSIS package we have created to periodically load data from Azure SQL database to Azure Data Lake requires a DateSclieToLoad parameter passed in that specifies which day of data to move. We can manually set the value of this parameter in the Execute Package dialog.
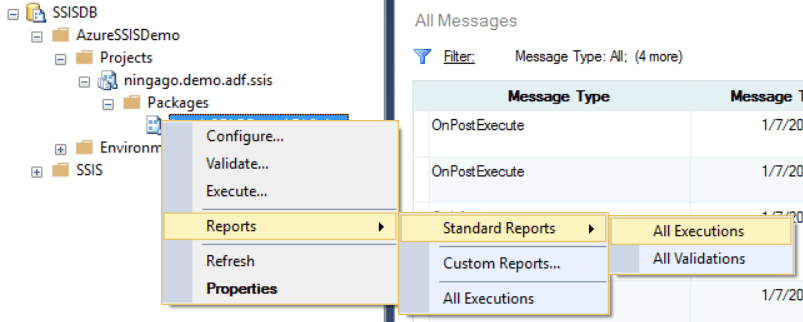
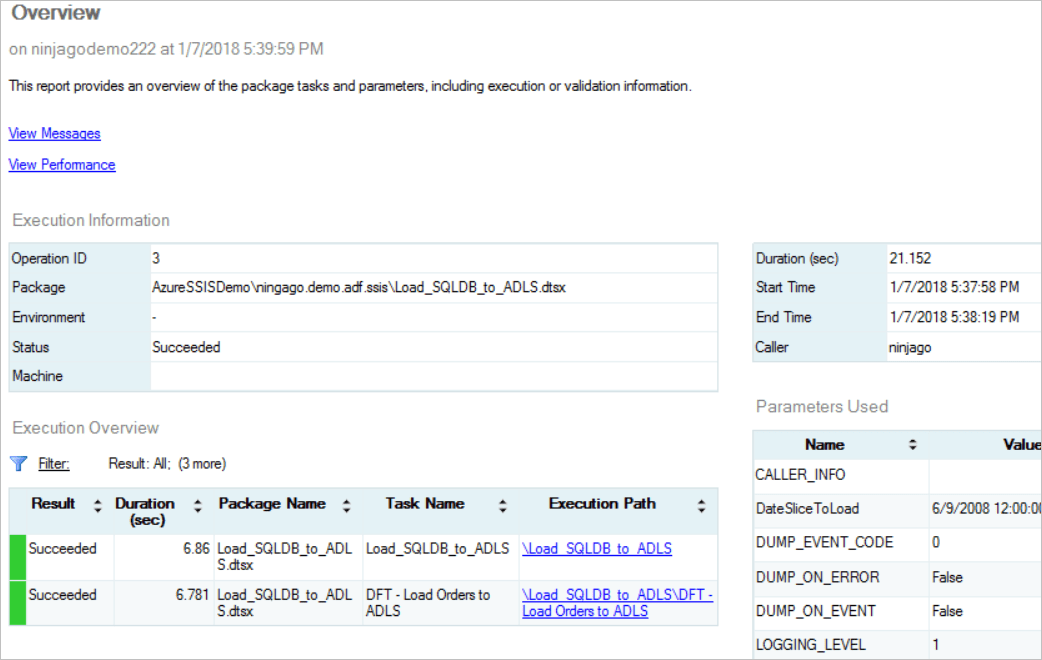
We can also monitor the SSIS package executions in SSMS through the SSIS catalog reports.

Up to this point, we have created the Azure-SSIS Integration Runtime and deployed our SSIS package into the runtime. We can execute the package and monitor the execution results manually in SSMS. In next blog post, I will walk through the steps to schedule the SSIS package execution using an ADF V2 pipeline. The ADF V2 pipeline will be scheduled to execute every day. The date of the current pipeline execution will be passed into the SSIS package, and the SSIS package will move the data by the given date parameter.
